This is the largest change in the release, and it is worth understanding properly rather than just switching it on. Scaling out is not free, it changes your expected result in ways that are easy to get wrong, so this guide covers the mechanics, the coverage warnings the interface will show you, and what the three advanced stop presets actually do.
Watch the walkthrough: How to Use Multi Take Profit and Stop Loss on Ouinex
Single mode and multi mode
The TP/SL section sits in the trade form. Advanced Config opens the full configuration window, and in the top right of that window is the Single/Multi toggle.
Single mode is the old behaviour: one take profit, one stop loss, applied to the whole position.
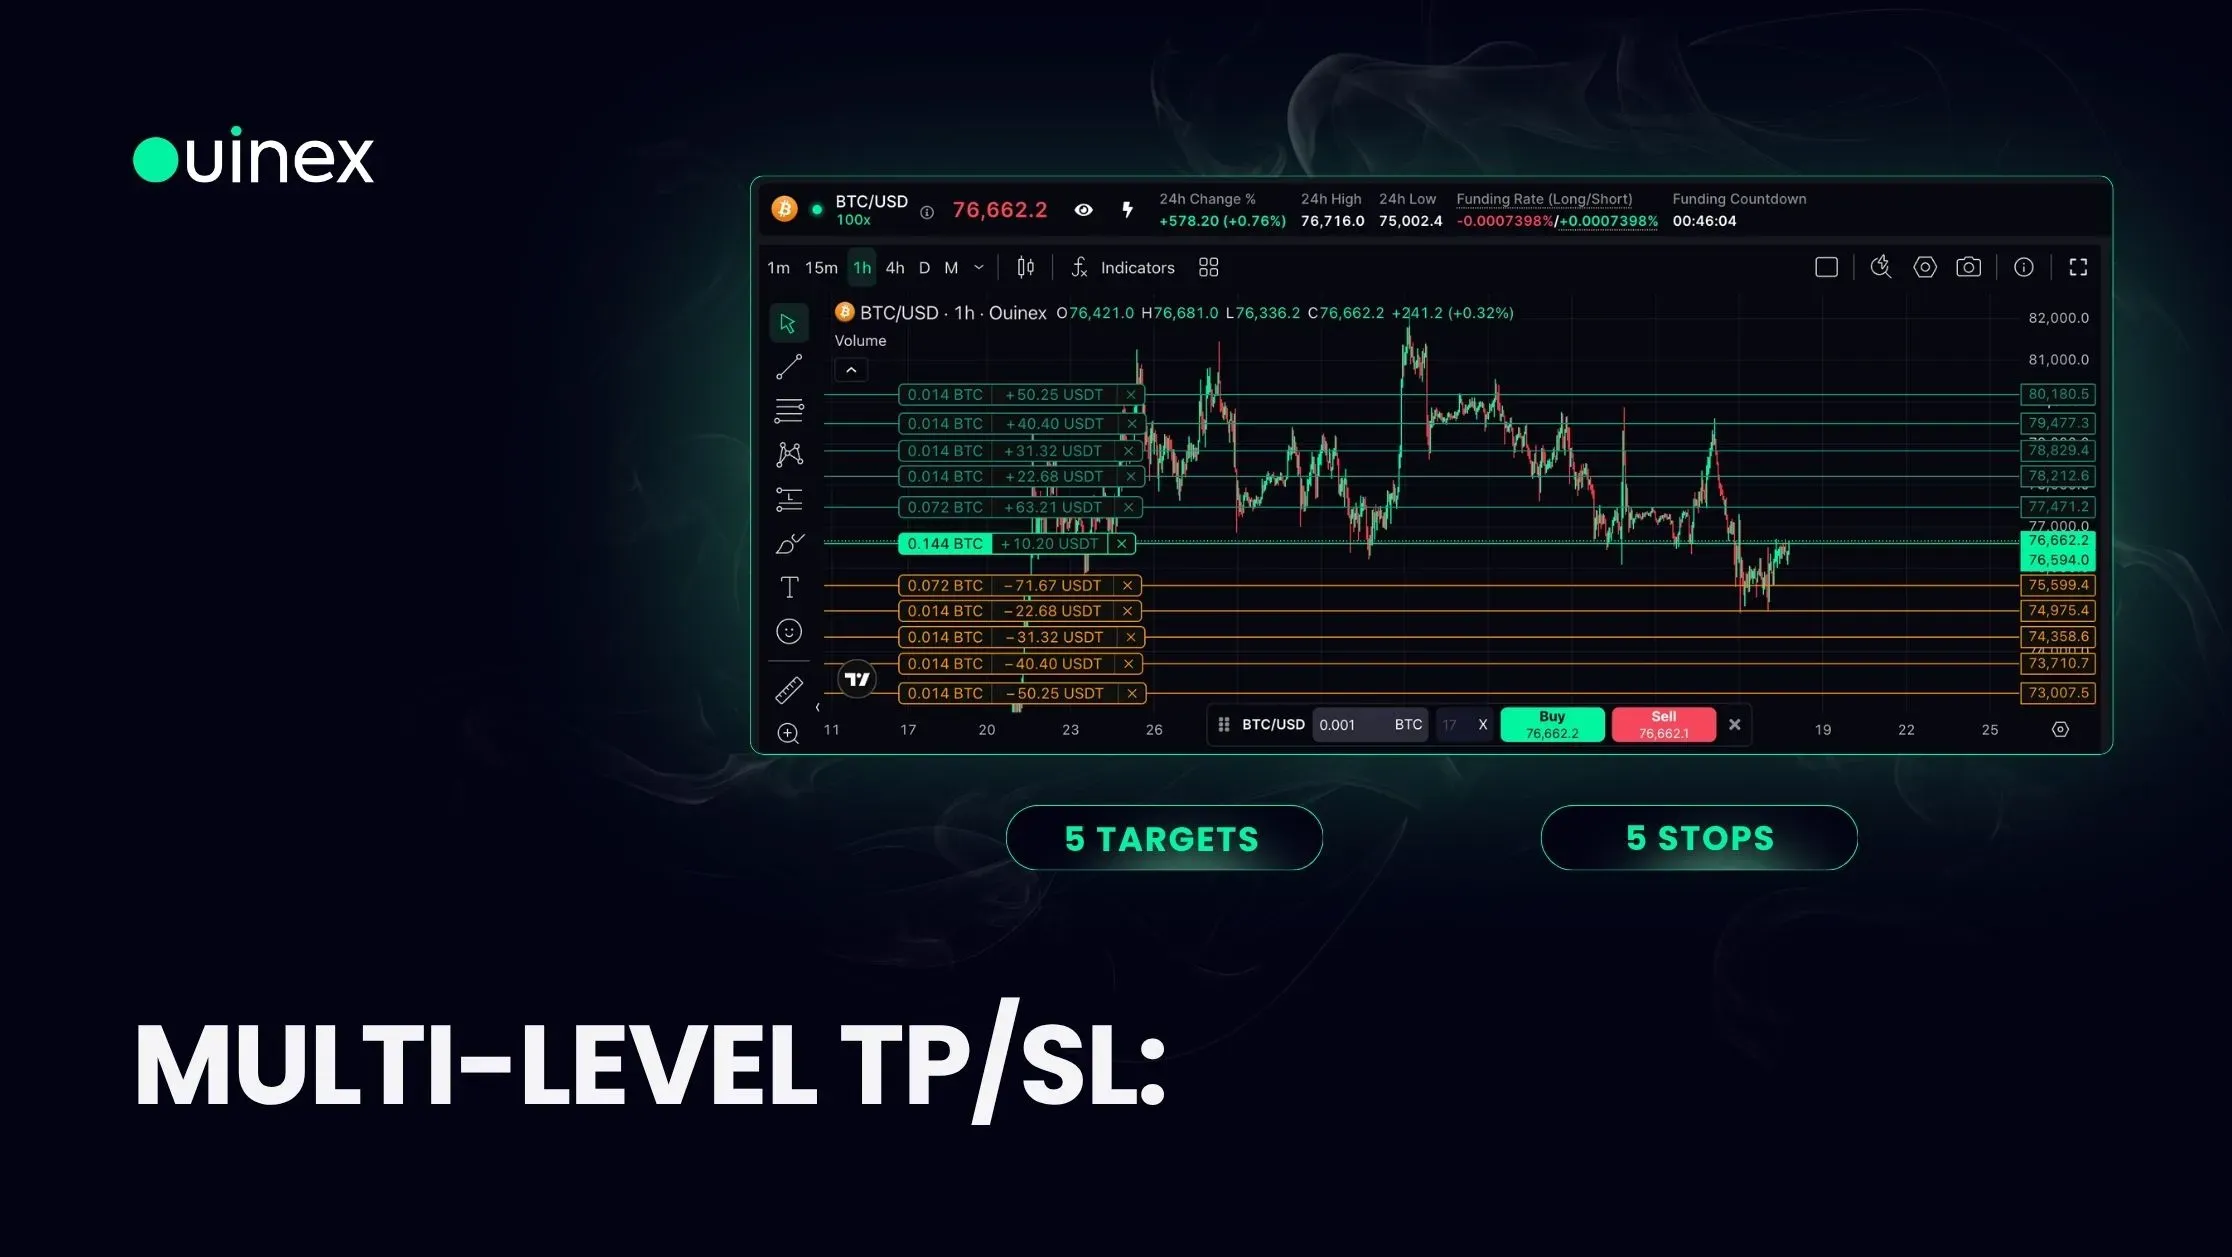
Multi mode lets you build a ladder. For each take profit you enter a price and a quantity, expressed either in lots or as a percentage of the position. Add TP creates the next level, up to five. Stop losses work identically, also up to five.
The Remaining line at the bottom is the number to watch. It shows how much of the position is not yet covered by the levels you have entered, and it updates as you type. If it does not reach zero, part of your position has no exit attached to it.
The coverage badges
Two badges appear on the position once it is open, and they are telling you different things.
A yellow warning badge means your levels do not cover the full position. Hovering shows the exact figures, Take Profit covers 99.99%, Stop Loss covers 80%, for example. That 20% of uncovered stop is a real exposure: if the market moves against you, four-fifths of the position closes and the rest keeps running.
Partial coverage is sometimes deliberate. More often it is a rounding artefact, five levels at 20% each rarely lands exactly on the position size once fees and lot precision are involved, which is why 99.99% appears so often. Either way, the badge is information rather than an error, and the fix is to adjust the last level until Remaining reads zero.
A shield badge means an advanced stop strategy is active: trailing stop, stop-win, or break-even.
The three advanced stop strategies
Enable Advanced SL in the configuration window to attach one of these to the position.
Break-Even. You set a trigger price. When the market reaches it, your stop loss moves automatically to your entry price. From that point the trade cannot close at a loss on the covered quantity.
The judgement call is where to put the trigger. Too close to entry and you convert ordinary noise into a flat trade over and over, the position keeps getting closed at break-even and then running to your original target without you. Far enough out that the move has genuinely established itself, and it does what it is meant to.
Stop-Win. You set a trigger price and a stop price. When the trigger is reached, the stop moves to your chosen level rather than to entry, locking in a minimum result above break-even.
This is break-even with an opinion. Use it when you want to protect more than just your capital once the trade is clearly working.
Trailing Stop. The stop follows the market as the trade improves and stays put when it does not. You set a Callback Distance in USD or a Callback Rate as a percentage, and optionally an Activation Price to delay the trail until a level is reached. Trailing stops are covered in full here, including how to size the callback.
All three move a stop in one direction only. None of them will ever move a stop further from your entry.
What scaling out actually costs
The part that rarely gets said: partial exits reduce your average winner as well as your variance.
Close 50% at target one and the remaining half has to travel further to produce the same result as leaving the full position on. If your first target is where most of the move ends, scaling out is clearly better. If your first target is a waypoint on a move that usually runs three times as far, scaling out has systematically cut your best trades in half.
Neither is universally right. What matters is that it is a deliberate choice about your own distribution of outcomes, not a default that feels prudent. A ladder of five targets on an instrument that rarely reaches the second one is five decisions doing the work of one.
The honest test is to look back at your own closed trades and ask how far they typically ran past the first target. That figure, not a rule of thumb, decides whether the ladder belongs on the position.
Managing the levels after the position is open
You are not locked into the configuration you set at entry.
From the chart. Once the position is open, add new take profits, add new stop losses, or drag existing levels to new prices. Click Set Config and the levels appear directly on the chart. The pencil icon opens the same configuration for direct editing.
From the position row. The Open Positions tab gives you the rest: apply a break-even, open the position info, partially close the position, or close it entirely.
View TP/SL levels lists every active take profit and stop loss with its price and quantity, which is the fastest way to confirm what is actually attached after a few edits.
One limit to know in advance: take profit and stop loss levels cannot be set inside the bid-ask spread. If a level would trigger the instant it is submitted, the confirm button is disabled with an explanation rather than letting you place an order that will immediately be rejected. The reason is covered separately, and the fix is simply to move the level further from the current price.
FAQ
How many take profit levels can I set on Ouinex? Up to five take profit levels and five stop loss levels per position, each with its own price and its own quantity, set in lots or as a percentage of the position.
What does the yellow badge on my position mean? Your take profit or stop loss levels do not cover 100% of the position. Hover over the badge to see the exact coverage on each side. The uncovered portion has no exit attached and will remain open when the covered levels fill.
What is the difference between break-even and stop-win? Break-even moves your stop loss to your entry price once a trigger is reached, removing the possibility of a loss on the covered quantity. Stop-win moves it to a level you choose above entry, locking in a minimum result rather than just protecting capital. Both move once and only in your favour.
Can I change my take profit and stop loss after opening a position? Yes. Levels can be added, edited or removed from the chart or from the Open Positions tab at any time while the position is open. Use View TP/SL levels to confirm what is currently attached.
Why is the confirm button disabled when I set my TP or SL? The level sits inside the bid-ask spread, which means it would trigger the moment it was submitted. Move the level slightly further from the current market price and the button will enable.
The bottom line
Multi TP/SL turns a single exit decision into a plan you can specify in advance, which is a genuine improvement, but only if the ladder reflects how your trades actually behave rather than how a careful trade is supposed to look. Get Remaining to zero so nothing is left uncovered, use the shield and warning badges as a live check rather than decoration, and pick one advanced stop strategy rather than trying to reason about three. Then leave it alone. The point of configuring exits before the trade moves is not having to decide while it is moving. The full configuration is available now on Ouinex derivatives.